


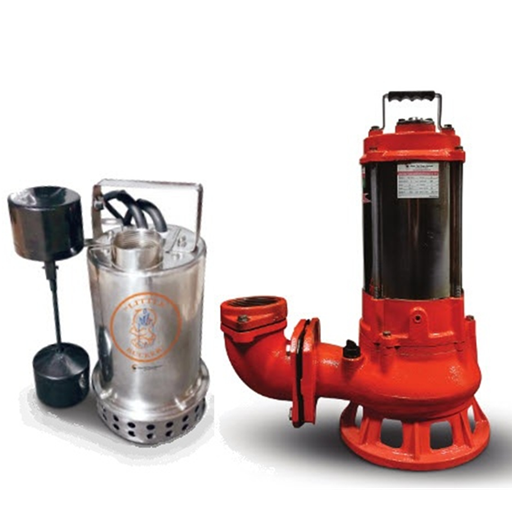

Basement flooding can cause thousands of dollars in damage and turn your storage space into a moldy nightmare. But here’s the good news: installing a sump pump yourself is more straightforward than most homeowners think.
You don’t need to hire an expensive contractor or have advanced plumbing skills. Actually, with the right tools and guidance, you can protect your home from water damage in just a weekend.
In this guide, we’ll walk you through everything you need to know about sump pump installation, from choosing the right location to testing your finished system.
Tools and Materials Required for Installation
Gathering the right supplies before breaking ground saves time and prevents mid-project trips to the hardware store. Installing a sump pump requires both specialized equipment and standard household tools, along with several components that work together to create a functional drainage system.
Essential Tools for the Job
Working with concrete, water, and electricity demands specific tools for the task. An electric jackhammer stands out as the most significant piece of equipment you’ll need to break through your basement floor. Most home improvement stores rent these for one-time projects, making them accessible without a major investment [6]. For smaller cutting tasks, a drill equipped with masonry bits and a 3/16-inch bit handles creating holes for pipe penetrations [10].
Hand tools form the backbone of your installation work
- Shovel and bucket for removing dirt, gravel, and concrete debris
- Tape measure for accurate pit dimensions and pipe lengths
- Level to verify proper pump and basin positioning
- PVC pipe cutter or hacksaw for cutting discharge pipes to size
- Adjustable pipe wrench and pliers for securing fittings
- Utility knife for deburring and trimming
- Shop vacuum for clearing standing water from the pit [10]
Sump Pump Components and Materials
The sump basin serves as the foundation of your system, typically measuring 18 to 24 inches in diameter [11]. Choose a perforated basin that allows water to enter from all sides. You’ll need several feet of 1.5-inch Schedule 40 PVC pipe for the discharge line, along with corresponding fittings and PVC cement to create watertight connections [11].
A check valve prevents pumped water from flowing back into the pit after the pump shuts off. This one-way door stops the pump from cycling repeatedly, which extends its lifespan [6]. A gate valve provides a manual shut-off point, making maintenance work simpler when you need to service the pump [6].
Gravel forms the base layer beneath your basin, providing drainage and stability. Ready-mix concrete patches the basement floor after installation [6]. When sourcing everything yourself, the total cost typically ranges between $300 and $600 [6][9].
Safety Equipment You’ll Need
Working with concrete, water, and electricity creates multiple hazards that proper safety gear mitigates. Eye protection shields your vision from concrete dust and debris when breaking through the floor. Ear protection guards against the loud noise produced by jackhammers and other power tools. A dust mask prevents inhalation of concrete particles, which pose respiratory risks [6].
Heavy-duty work gloves protect your hands from sharp edges, rough materials, and abrasive surfaces throughout the installation process [6]. Some installers also wear steel-toed boots to shield feet from heavy objects or accidental drops.
Before starting work, check with your local building department about permit requirements. Depending on where you live, you might need approval from your municipality to install a sump pump, particularly when connecting to city drainage systems. When working with professional plumbers, they handle all permitting requirements, but DIY installers must obtain these approvals independently [6].
Step-by-Step Sump Pump Installation Process
Installing a sump pump transforms from intimidating to manageable when broken into clear steps. Each phase builds on the previous work, creating a reliable water removal system.
Step 1 Choose the Right Location
Water flows to the lowest point in your basement, which makes this spot the ideal pump location [7]. Position the sump at least 8 inches away from foundation walls to avoid structural interference [9]. Proximity to an exterior wall simplifies discharge pipe installation and reduces the length of piping needed [7]. Verify that an electrical outlet sits within reach of the pump’s power cord, typically 8 to 10 feet long [12]. The outlet must sit on a dedicated circuit and at least 4 feet off the floor [12].
Step 2 Dig the Sump Pit
Mark a circle on your basement floor that’s 3 to 6 inches larger than your basin diameter [9]. Break through concrete using a jackhammer, cutting manageable pieces rather than pulverizing the material [13]. Excavate the hole at least 12 inches deeper than the basin height [13]. The pit should measure at least 22 inches deep and 14 to 18 inches in diameter to allow the float switch adequate movement space [12].
Step 3 Install the Sump Basin
Add 4 to 6 inches of gravel to the hole’s bottom, then place a large paver to create a stable, level surface [9]. Drill 1/4-inch holes in the upper third of the basin if it lacks perforations [9]. Wrap the exterior with landscape fabric to prevent silt from entering [9]. Lower the basin into position and backfill around it with gravel to within 6 inches of the floor surface [9]. Never place a pump directly on earth or gravel, as this causes impeller wear and jamming [12].
Step 4 Set Up the Sump Pump
Connect a threaded adapter to your PVC discharge pipe using primer and cement, then thread it into the pump’s discharge port [12]. Position the pump inside the basin, verifying the float switch moves freely without hitting walls or piping [9]. Drill a 3/16-inch weep hole in the discharge pipe about 2 to 3 inches above the pump outlet at a 45-degree downward angle [9]. This prevents air lock, which causes pump failure [12].
Step 5 Install the Check Valve
Attach the check valve to the vertical discharge pipe with the directional arrow pointing upward [14]. This orientation prevents water from flowing backward into the pit after the pump stops [10]. Install the valve close to floor level to minimize water volume that drains back during each cycle [15].
Step 6 Connect the Discharge Pipe
Run the PVC piping through a hole drilled in your rim joist, sealing the exit point with expanding foam [9]. Extend the outdoor discharge line at least 10 to 20 feet from your foundation [9]. Apply PVC cement to all connections, twisting slightly to lock fittings securely [12]. Deburr all cut pipe edges with a utility knife to prevent leaks [12].
Step 7 Test the System
Plug the pump into a GFCI-protected outlet and pour five gallons of water into the pit [9]. The pump should activate automatically and discharge water efficiently [9]. Listen for the check valve flap opening as water pressure increases [14]. Verify the pump shuts off completely when water drains.
Step 8 Secure and Finish the Installation
Use zip ties to secure electrical cords to the discharge pipe, keeping them below outlet height to prevent water damage [12]. Pour concrete over the gravel gap around the basin, smoothing it flush with the existing floor [9]. Place a sturdy cover over the pit opening to block debris and odors [12].
Sump Pump Maintenance and Testing Tips
Proper maintenance extends pump lifespan and prevents failures when you need protection most. A well-maintained system operates reliably for years, while neglected pumps fail during heavy storms.
Regular Testing Schedule
Test your pump quarterly to verify proper operation [16]. Pour approximately five gallons of water into the basin and watch the float switch rise [17]. The pump should activate immediately and discharge water efficiently. After storms that introduce significant water to your property, perform additional tests [18].
Pumps that dispose of washing machine water require monthly testing due to the strain soapy water places on the system [19]. Professional maintenance should occur at least once annually [6]. Check the power cord and electrical connection every three to four months [11]. Verify the plug sits fully inserted in a GFCI outlet [20].
Cleaning and Inspection Tasks
Keep the inlet screen clean and free of debris buildup [21]. The screen prevents dirt and solid material from entering the pump, but it becomes overwhelmed without regular cleaning. Inspect the float switch for tangles or jams [21]. A jammed float renders the pump useless because it cannot sense when to activate.
Remove debris from the sump basin wearing gloves [17]. Sand, silt, leaves, rocks, and small plastic pieces accumulate over time. Disconnect the pump from the discharge pipe, which may require WD-40 if mold builds up around the connection [17]. Clean the pump exterior with a damp cloth or garden hose, then inspect for corrosion or damage [17].
Check the discharge pipe to confirm it diverts water at least 20 feet from your foundation and flows freely without clogs [17]. The check valve arrow must point away from the pump [11].
When to Replace Your Sump Pump
Sump pumps last approximately 7 to 10 years on average [22]. Replace pumps older than seven years showing inefficiency signs [23]. Unusual noises, excessive vibration, or irregular cycling indicate declining performance [23]. Rust, visible damage, or a constantly running motor signal imminent failure [23].
Common Installation Mistakes to Avoid
Even experienced DIYers make critical errors when installing a sump pump. Understanding these pitfalls helps you avoid costly repairs and system failures.
Improper Basin Sizing
Selecting the wrong basin dimensions undermines system effectiveness. A basin should hold at least 24 inches of water at the bottom to allow adequate pump run time and prevent short cycling, which leads to premature failure [24]. Small pits fill too quickly, causing the pump to run continuously and wear out faster. Conversely, oversized basins delay pump activation, allowing water levels to rise dangerously high before drainage begins [25].
Poor Discharge Pipe Placement
Discharge pipes require careful positioning to function properly. Pipes must extend at least 10 to 20 feet from your foundation to prevent water from seeping back into the basement [25]. Underground sections face damage from tree roots, which can crack pipes without visible warning signs [26]. Installing pipes without proper slope creates stagnant water and potential clogs. Using undersized tubing, such as garden hoses, reduces pump capacity by more than 80% [27].
Electrical Connection Errors
Plugging your pump into extension cords or overloaded power strips causes power interruptions and fire hazards [25]. The system requires a dedicated circuit with a GFCI outlet to operate safely [25]. Loose or corroded wiring triggers intermittent failures that leave basements vulnerable during storms [28].
Skipping the Check Valve
Omitting this component forces pumps to cycle repeatedly as water drains back into the pit after each operation [29]. This unnecessary work shortens pump lifespan and increases energy costs [29]. Installing the valve too high on the discharge pipe causes rapid refilling and immediate restart cycles [7].
Conclusion
You now have everything you need to install a sump pump and protect your basement from costly water damage.
The process might seem complex at first glance, but by following these steps, you can complete the installation in just a weekend. Without doubt, the money you save on contractor fees and the protection you gain for your home make this project worthwhile.
Remember, proper installation is equally important as choosing quality components. Test your system regularly and perform routine maintenance to keep it running efficiently for years to come.
Your basement deserves protection, and you have the skills to make it happen. Get started today!
References
[1] – https://home.howstuffworks.com/sump-pump.htm
[2] – https://www.inspectionsupport.com/what-is-a-sump-pump-and-how-does-it-work/
[3] – https://en.wikipedia.org/wiki/Sump_pump
[4] – https://www.asfoundationrepair.com/the-importance-of-a-sump-pump-in-your-basement/
[5] – https://marylandmoldandwaterproofing.com/the-benefits-of-sump-pump-installation-in-your-home/
[6] – https://www.allstate.com/resources/home-insurance/sump-pump-inspection-tips
[7] – https://zoellerathome.com/2023/09/29/importance-sump-pump-check-valves/
[8] – https://americandry.com/adding-a-sump-pump-to-an-existing-basement/
[9] – https://warelandscaping.com/how-to-install-a-sump-basin-and-sump-pump/
[10] – https://www.drainageconnect.com/en/1-5-sump-pump-swing-check-valve?srsltid=AfmBOornu_dgNSr2gpI2o2MXe8SrVLiGEPPju24-6Vbg9u-_jzcM8HOd
[11] – https://thewaterworks.com/sump-pump-maintenance-checklist/
[12] – https://www.fergusonhome.com/how-to-install-a-primary-sump-pump/a29849?srsltid=AfmBOoqeZ4BBVUyNcNxnIJxKtqQlNovyqmI4qj5DZwN1LoEG3YCoqzEV
[13] – https://www.wikihow.com/Install-a-Sump-Pump
[14] – https://www.wikihow.com/Install-a-Sump-Pump-Check-Valve
[15] – https://blog.boshart.com/how-to-properly-install-a-compression-connection-check-valve-in-a-sump-pump-effluent-or-sewage-system
[16] – https://www.worryfreeplumbing.com/how-often-should-you-test-your-sump-pump/
[17] – https://www.ahs.com/home-matters/repair-maintenance/sump-pump-maintenance-tips/
[18] – https://www.alltechservicesinc.com/blog/plumbing-service/time-test-sump-pump-heres-how/
[19] – https://safetyculture.com/topics/sump-pump-maintenance
[20] – https://www.relianceplumbing.com/blog/plumbing-service/time-test-sump-pump-what-to-do/
[21] – https://www.nachi.org/sump-pumps.htm
[22] – https://plumblineservices.com/help-guides/Signs-its-time-for-a-sump-pump-replacement
[23] – https://www.regalplumbinginc.com/blog/plumbing-service/how-often-should-i-replace-my-sump-pump/
[24] – https://zoellerpumps.com/2024/05/03/choosing-best-size-basin-sump-pump/
[25] – https://www.onpointplumbingandheating.com/proper-sump-pump-installation
[26] – https://www.construction21.org/articles/h/top-10-mistakes-to-avoid-with-your-home-s-sump-pump.html
[27] – https://structuretech.com/sump-system-defects/
[28] – https://sumppumpgurus.com/common-mistakes-in-sump-pump-installation-7/
[29] – https://blog.boshart.com/why-are-sump-pump-check-valves-important